
At what stage of your workflow do you sharpen or apply grain? Do you do it before or after you resize your images?
Since sharpening and applying grain are strictly related to the actual dimension of an image, your timing significantly influences the final results.
Why?
Pixel interpolation happens every time you have to increase or decrease the total amount of pixels of an image, and every time you rearrange those pixels within the raster grid. This includes whenever you rotate an image, change its perspective, use the warp or liquify tool, etc.
The results of these processes can vary quite a lot, depending on the interpolation algorithm used.
If we talk about downscaling or upscaling, Photoshop allows for the use of different ones depending on the scope. We can choose between Preserve Detail, Bicubic Sharper, Bicubic Smoother, Nearest Neighbor, and Bilinear. It wouldn’t be entertaining to talk about the technical differences; you just need to know that each one of them operates in a slightly different way, and it fits a specific purpose (image enlargements, image reduction, smooth gradients, etc.).
To allow these enlargements or reductions, the algorithms need to operate an approximation. They use known pixels to estimate the value of new pixels that didn’t exist before. For this reason, it’s quite common to perceive some sort of quality loss during the process.
Here you have an example of an image enlargement and a reduction.
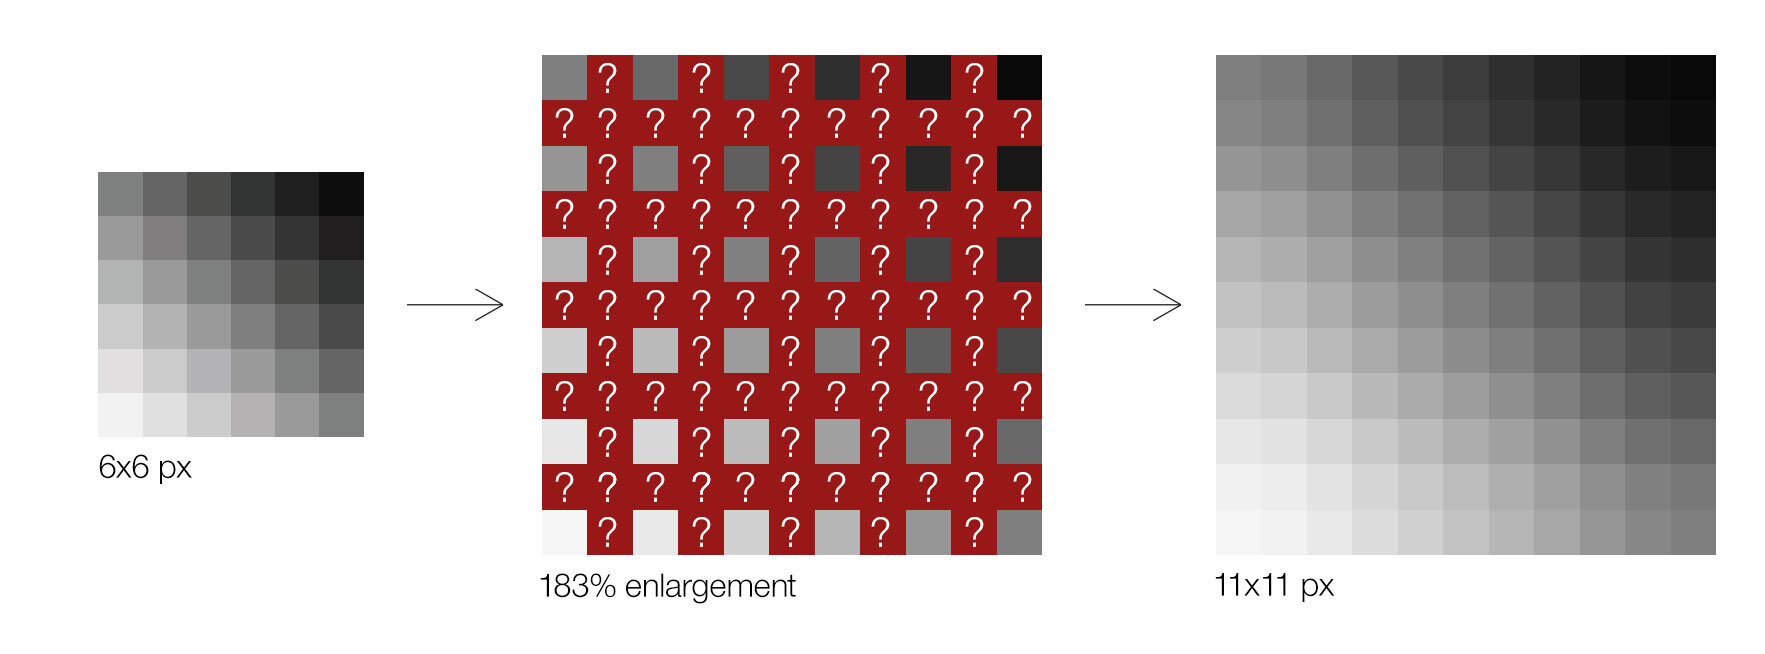

You can clearly see now that the more you stretch or shrink an image, the more pixels the algorithm needs to guess to create a new resampled version.
The same estimation process occurs to your Sharpening or Grain application if you do it before resizing. The Sharpening values that you chose (% amount, pixel radius, level threshold) or the Grain characteristics that you selected (% amount, size, distribution) will inevitably be approximated by the algorithm, resulting in a significantly different outcome.
In this example, you can easily see how the negative effect of the algorithm altered the appearance of the grain. After downsampling, it looks smudged and much less sharp.
For these reasons, the best option would be to sharpen and add grain at the end of your workflow, right after resizing the images. I’m aware that this process can be extremely time-consuming, especially when working only in Photoshop, and dealing with large batches of files.
This is the reason why I always try to export my images in Capture One using the Recipe tool under the Output tab while keeping the Recipe Proofing view enabled.
I set a custom Recipe (e.g. 1500 px, sRGB, 80% quality, 8bit).
I export the images adding a bit of sharpening using the Adjustment tab with Recipe Proofing enabled to check their appearance. No guesses.
If I want to add grain, I just export the images twice. Capture One does not allow the addition of grain under the Adjustment tab, as it does for sharpening. This is the process with one more step:
I set a custom Recipe (e.g. 1500 px, sRGB, 80% quality, 8bit).
I export the images adding a bit of sharpening using the Adjustment tab with Recipe Proofing enabled to check their appearance.
I open the new downsampled versions of the images in Capture One, and I apply grain using the Film Grain tool under the Details tab.
I export again the images but full-size this time (they’re are still 1500 px because of the previous export). Remember to turn off the sharpening this time to avoid doing it twice.